Kernel Panic Error on Your Mac: How to Fix it
Kernel Panic on a Mac is the counterpart of the “blue screen of death” of the Windows world. You’ll recognize it when your Mac stops in its tracks and restarts without warning. If Kernel Panic was a one-time occasion, which you could fix by restarting, your Mac is out of the woods. On the other hand, if your Mac gets stuck in a loop of recurring Kernel Panics, it may be a symptom of a severe low-system issue. In this post, we take a look at the ways to troubleshoot a Kernel Panic error.
Kernel Panic explained
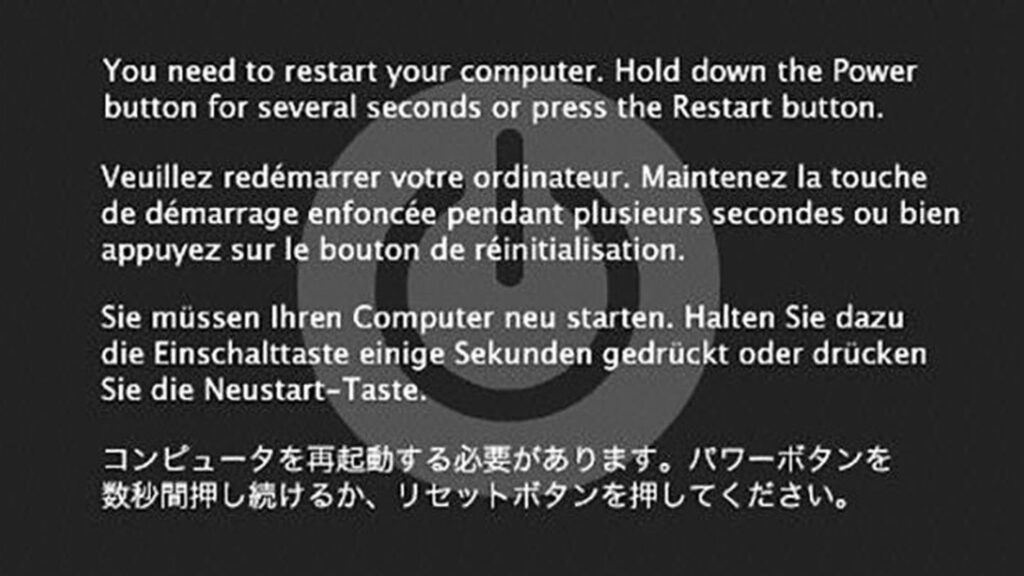
image via lifewire.com
A tell-tale sign of a Kernel Panic is a black screen with an alert that prompts the user to restart their machine. In earlier macOS versions, the Mac will restart and show you a problem report afterward.
The causes of Kernel Panic may vary:
- Hardware issues and damages, especially related to turning on and off;
- Lack of RAM or disk space;
- Operating system bugs that go back to low-level code;
- Conflicting software or hardware components;
- Memory, storage, or logic board errors.
If you see the Kernel Panic alert, the only way to get rid of it is to press and hold down the power button to turn your Mac off. After that, you should wait for a few seconds and start your device in the usual way.
How to troubleshoot the Kernel Panic problem
Safe Mode mode disables external processes, such as updates, startup and login items, custom fonts, etc., loading only essential kernel extensions, so you can only access the vital functions to fix the problem. How to enter Safe Mode?
- Shut down your Mac;
- Wait for a few seconds and restart it holding Shift;
- Wait for your Mac to boot, then let go of the key;
- Log in to your account and access the system using Safe Mode.
View Kernel Panic logs
Kernel Panic leaves a trace in the logs with information about the error’s nature. You can dive into the records to find out what caused the system crash. Here’s how to fix the Kernel Panic using logs:
- In Safe Mode, go to Finder – Go – Go to Folder and type in /Library/Logs/DiagnosticReports;
- Access the Diagnostics reports;
- Find Finder Panic log and double-click it;
- Locate for the faulty kernel to identify what app it goes back to;
- Uninstall or update the application.
Fix hardware problems
RAM: If you’ve just upgraded RAM, it’s best to check it and check if it’s installed correctly. Try removing the module and see if this fixes the problem.
Remove peripherals: Devices connected to your Mac may also cause the Kernel Panic, including a web camera, mouse, USB hard drive, as well as a printer or scanner.
Run a disk check: A damaged Mac disk can cause Kernel Panic. You can diagnose it by going to Disk Utility. To do that, you should restart your Mac in Recovery Mode and find Disk Utility by going Finder – Applications – Utilities – Disk Utility. Then, choose a disk and go with “First Aid” and see if it fixes the problem.
Fix software problems
Sometimes a faulty app is the culprit behind the Kernel Panic, so you need to locate the corrupted app and troubleshoot it.
Check your apps: Make sure your apps run the current versions, especially ones that load upon startup. Essentially, if you’ve installed any apps before Kernel Panic, it’s best to remove them, as they may be the root of the problem.
Reinstall or update macOS: Your current version of the operating system may cause Kernel Panic. As such, run an update of your operating system. If it doesn’t fix the problem, consider reinstalling it from the ground up.
How to prevent Kernel Panic
Although it’s relatively rare, Kernel Panic is one of the most unpleasant Mac troubles. More often than not, it’s just a side effect of the problem with your software or hardware, but not the problem itself. It can be compared to another woe of Mac users when a device shuts down unexpectedly, which can also be a symptom of a system conflict. If you’ve run into a problem like this, read on and see that it has a lot to do with Kernel Panic. Here are the measures you can take to prevent Kernel panic:
- Keep up to 20% of disk space open;
- Update your apps and operating system regularly;
- Steer clear of apps from unreliable sources;
- Avoid running multiple resource-heavy processes;
- Use only trusted peripherals.
Hopefully, our post has helped you combat the Kernel Panic issue.


