How Symfony Hosting Works Better With Cloudways Managed Hosting

Introduction:
- What is Symfony
- Why Symfony
- Why Cloudways For Symfony Hosting
- Who To Use Symfony Hosting With Cloudways
- Requirements To Integrate Symfony Hosting
- Installation Process of Symfony Hosting with Cloudways
Symfony is an open-source PHP framework used by dynamic and popular solutions like Laravel, Drupal, Piwik and phpBB. It speeds up application creation and support, and replaces repetitive coding tasks with power, control, and ease.
Thanks to the many benefits it offers, this mature solution has a huge community of clients and over 5 million month-to-month downloads.
Here are some reasons why you might want to use Symfony, as well as an easy, detailed guide to the installation process.
Why Use Symfony
With its leading MVC architecture and distinctive components, Symfony can make secure websites and web applications. Let’s dive into some of the benefits it offers.
Easy for Developers to Use
The Symfony PHP framework is a feature-rich, well-organized PHP framework that clears the way for developers to create sustainable web applications as effortlessly as possible. User experience is a foremost priority.
Customization Abilities
Symfony is packed with elite custom features and functionalities for engineers and businesses. Its full-stack builds a complex product with plenty of customization opportunities. This includes brick-by-brick customization, so you can create your custom system to build an application with selective functions.
Refined MVC Architecture
The MVC design of the Symfony system is perfect for systematic and versatile web development projects. Using MVC as the core of its web development, the Symfony system ensures the project has an organized record structure that’s distributed into Model, View, and Controller.
Large Community
Symfony’s official website declares 3000+ contributors, over 600,000 developers, and +523,000,000 monthly downloads. The framework has over 20,758 stars and 1,304 watchers and has been forked 6,901 times on Github.
Who Uses Symfony?
Symfony is used by a variety of enterprises and platforms like OpenSky, a social shopping platform, eRepublik, the massively multiplayer online browser game, the Vogue Paris site, and the content management system eZ Publish in version 5. It is also used on most of Meetic’s websites, one of the largest online dating platforms in the world, to execute their business logic within the backend.
Symfony components are also utilized in other web application frameworks, including Laravel, another full-stack framework, and Silex, a micro framework. Drupal 8, phpBB and several other extensive applications also have consolidated components of Symfony.
A Guide to Install Symfony Hosting with Cloudways
If you do choose Symfony Hosting, deploy hosting on a top cloud platform such as Cloudways to fully harness its potential.
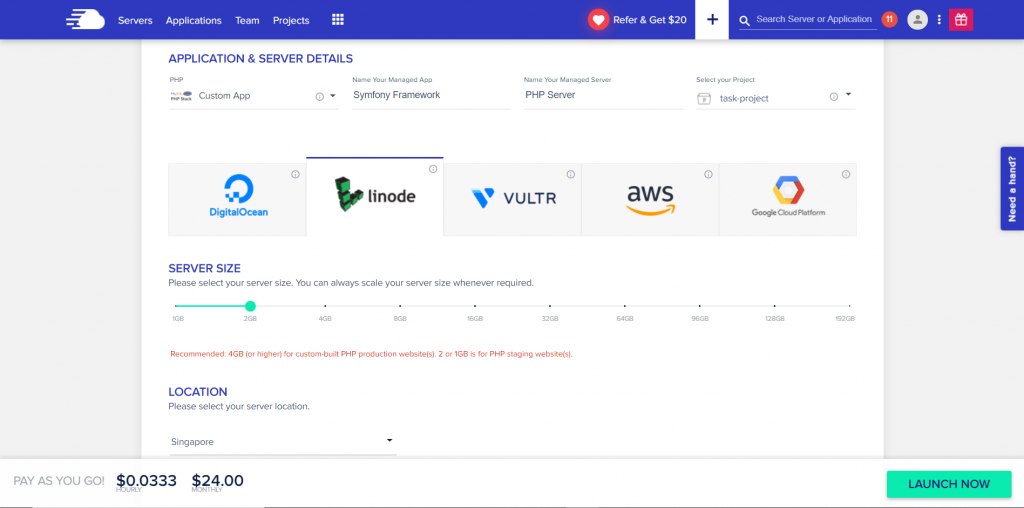
To set up a PHP 8 server on Linode at Cloudways, sign up for your Cloudways account, and then login. It only takes a few minutes to sign up for a Cloudways account (and avail a three-day trial period).
Next, at the server launch page, select Custom PHP App as your application & Linode as your infrastructure provider. Identify your server resource needs along with other required details.
And you’re done! Your Linode server will now be deployed.
By default you will get PHP 8.0 on the server. However, you can upgrade or downgrade to versions 5.6 to PHP 8.
Launch the SSH Terminal
Click on to the Server Management tab to launch the SSH Terminal that is located in the Master Credentials. Here you can find your login credentials for the SSH terminal.
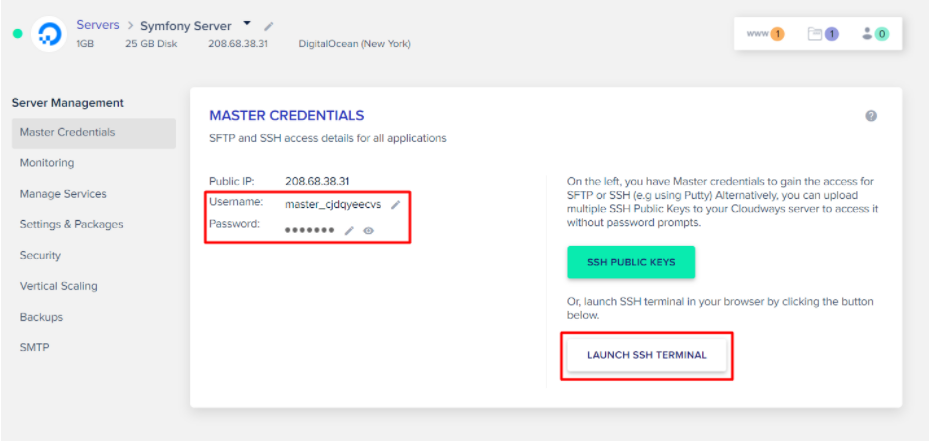
Login to SSH with these Master Credentials.
Empty your public_html directory
Empty your public_html directory by deleting all files in it. To remove all files, move to your public_html folder and delete all files using the `rm -Rf *` command.

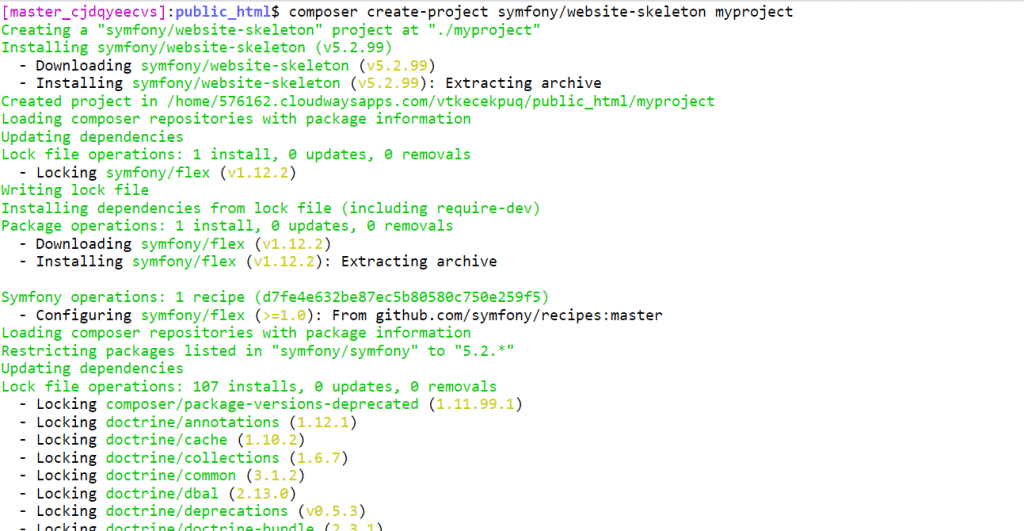
Method 1: Install Symfony Using Composer
Use the following command to install Symfony through Composer.
composer create-project symfony/website-skeleton myproject
Configuring the Database

Symfony will install soon after you provide your database information.
You can access the Symfony welcome page by adding /myproject/public/ to the default application URL. If you see the welcome page, everything has been configured successfully.
Open any web browser and access the welcome page of Symfony by entering
http://your_application_url/your_project_directory/web.
That’s it: your latest version of Symfony is ready to use.

Method 2: Deploy Through GitLab on the Cloudways Platform
You likely have your PHP application on GitHub. No problem – you can directly deploy it on the Cloudways Platform by following these simple executional steps.
Step 1: Generate the SSH Key
Sign in to your Cloudways account, access the server where you have to deploy the application, and go to the Applications Settings.
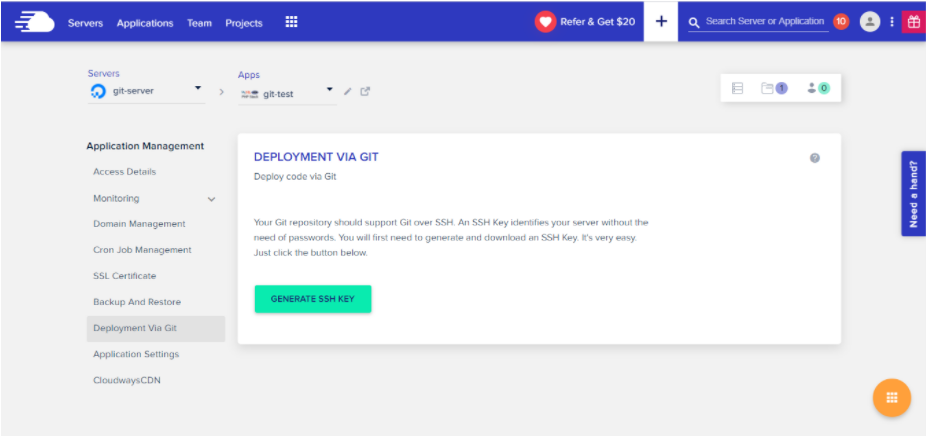
To deploy the application from a Git repo, first, in the Platform dashboard, click the Applications tab from the top menu bar. Select your application from the list that pops down. You will now need a mechanism to generate and download the SSH keys that are the critical-authentication aspect of the process.
You Might Also Like: Create Token Based API Authentication in Symfony
Step 2: Upload the SSH Key to the GitLab Repository
To do this, click on the Deployment via Git button in the Application Management area, and then click the Generate SSH Keys button to generate your unique SSH key. Click on Download SSH Keys’.
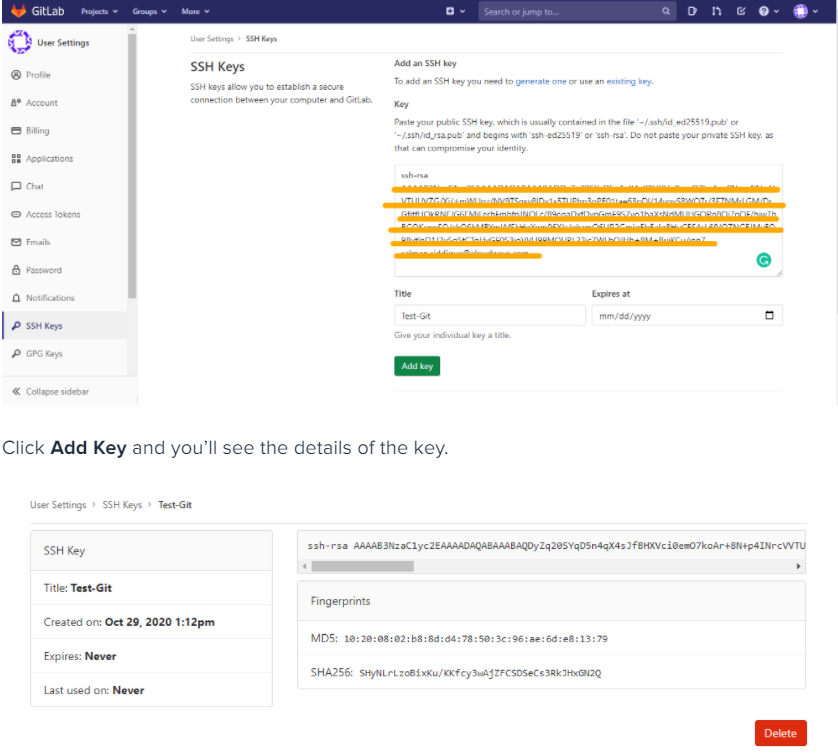
To let Cloudways access your application on the Git repository, upload the SSH Public Key (that you have just downloaded in the previous step) to the GitLab.
For this, login to your GitHub account, go to the desired repository, and into the Settings tab. Here, locate the Add Deploy Key button and use it to add the SSH Public Key. You can do this by opening the file downloaded in the previous step and pasting its content into the space provided by GitHub. Click on the Add Key button to finalize the input of the SSH key.
Step 3: Copy the SSH Address of the Repository
Move to the repository you would like to clone on the server. Click the Clone option to see two options in the dropdown: Clone with SSH or Clone with HTTPS. Copy the URL beneath the Clone with SSH.
Note: The option to Clone with HTTPS isn’t supported by the Cloudways Platform.

Manage PHP-FPM, Varnish & Cron Settings
Cloudways’ custom UI panel lets you manage PHP-FPM and Varnish settings. Although the default configuration is already in place, you can easily change all the settings to suit your own development-related requirements. In the Varnish settings, you can define a URL that is to be excluded from caching. You can also set permissions in this panel.
Cron jobs are a very commonly used component of the PHP application development process. On the Cloudways Platform, you can easily set up cron jobs in just a few clicks. Just declare the PHP script URL and the time when the script will run.
Step 4: Deploy the Application Code from the Repository
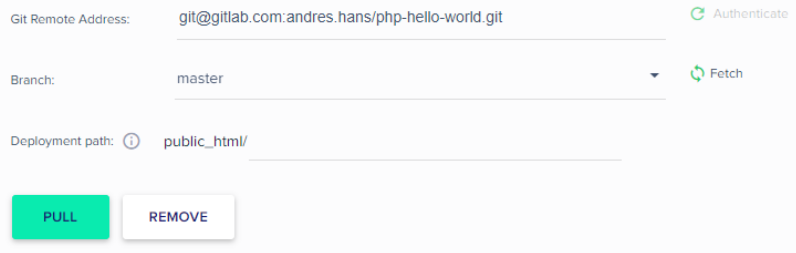
Move back to the Cloudways Application Settings > Deployment Via Git, and paste the SSH address of the repository you have got replicated.
Click Authenticate to let Cloudways authenticate the SSH address.
After authentication, select the branch of your GitLab repository you wish to deploy from. Here, I am utilizing the Master branch. Next, type the deployment way. Conclude the arrangement with a /. In case you leave this field null, the code will be deployed to the public_html/ folder by default.
Finally, click Start Deployment to deploy your code.
Upon successful GitLab deployment of your application, you’ll get a green-colored pop-up message saying “Git cloned”.
Conclusion
PHP development requires working with external libraries and packages. Say you are working with Laravel and you need to install an external package. Well, since Composer has become the standard way of installing packages, it comes pre-installed on the Cloudways platform. Just launch the application and start using Composer in your project.
Similarly, if you are familiar with Git and maintain your project on GitHub or BitBucket, you don’t need to worry about Git installation; that also comes pre-configured on Cloudways. You can start running commands right after the application launch
Related Posts

Primary Considerations for Building Resilience in Your Disaster Recovery Plan
June 15, 2026Without a solid disaster plan, system failures can plunge operations into the ...

The 2026 Data Observability Vendor Database: 20+ Platforms by Founding Year, Funding, Hosting, and Pricing
June 12, 2026The data observability market has evolved rapidly over the past five years. ...

6 Leading Red Teaming Companies for Enterprises in 2026
June 6, 2026Red teaming has changed from a technical exercise into a leadership test. ...

Best 5 Akamai CDN Alternatives for 2026
May 25, 2026Content delivery infrastructure is evolving rapidly as modern applications become increasingly distributed, ...

Best 5 Engineering Analytics Platforms of 2026
May 15, 2026Engineering organizations are operating in an environment that is significantly more complex ...